IMPORTANT: This modification has been carried out on a number of printers now without problems. However the approach leaves a large space for any ink leaks to build up or fall from. As a result I would still advise placing the measures suggested below.
Precautions
To ensure that you do not suffer from waste ink leaking via an unexpected path within/under the printer I would recommend sitting the printer in/on a plastic tray with edges that can trap any leaks as a precautionary measure.
I hope to remove this warning or provide a suitable workaround in the near future but for now, please take sensible precautions if you choose to apply this modification
This modification should work for the Artisan 800 and 700. Other area model numbers appear to be PX800FW, PX700W (UK, Eur) and TX800FW, TX700W (Aus).
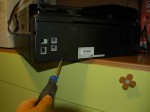
The PX800FW (Artisan 800) seems to have a new approach to make waste pad maintenance much simpler. We found that the pad sits in a holder and is accesible from under the printer, above that metal plate.
As with the trapdoor units the holder is secured with a single screw so you will need to undo this as shown (left)
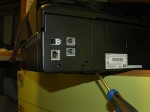
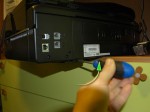
To remove the holder you need to use a insert a thin bladed screwdriver or similar and use it to lever the pad holder down as shown in this picture and the one right.
This should pop the holder off any retaining clips and allow the holder to drop down.
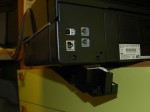
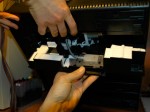
The image (left) shows you with the pad holder released.
You do need to be careful at this point, not to pull the holder too abruptly as the usual risks apply. If the other end of the tube gets broken off the cleaning pump your printer is going require a serious service to fix it. So…
IMPORTANT:Do not pull the holder or tube so the length heading to the pump is strained.
The picture left shows how the tube connects to the holder and you need to release this so you can remove the holder completely to leave the waste tube free.
Once you’ve disconnected the waste pad holder, put it in a sealed bag and box it so it doesn’t get damaged or soiled. You may need to re-assemble the printer again to get it serviced or other non-waste issues fixed.
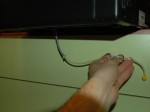
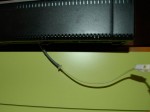
Next up, you need to attach your tube extension (OctoInkjet Solo Long kit shown).
Again be careful and be careful not to split or damage the tube.
Because the tube hangs loose under the printer you need to be careful not to put the printer feet on the tube causing it to be blocked.
I would recommend using some electricians tape or similar to hold the tubing in place where possible.
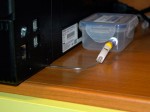
The last thing to do is obviously to attach your chosen tank or container to your tubing and make sure any clamps (such as the one shown) are open and not impeding ink flow.
Run your first test with a single cleaning routine to make sure everything is working properly and adjust as required.
Once this is done, I’d seriously look at finding a way to buffer the tubing from any pulls on the tubing to avoid the pump end breaking off. You could do this using a self-adhesive nylon tie mount or similar but I would definitely look at ways to reduce the chance of an accident.
Resetting the Printer

Available at last!
While 2manuals still have the adjustment utility for this model there is now a free version for both the 700 (PX700W, TX700W, Artisan 700) and the 800 (PX800FW, TX800FW, Artisan 800) models…
These have been unlocked by OrTHoTaMiNe and then posted publicly… The quickfind links below provide more information.
Other options?
It’s highly like that reset utilities will only appear for North American customers (as per Epson policy) and as it is one of the newer generation printers Epson will “protect” the utility with their new activated IPR utility so for those in North America you will have some hoop jumping to go through.
I can confirm that the SSC utility does not support this model at all so the only other viable option is to ask an Epson service technician to reset the waste counter without replacing the pads.
Note: As always any resetter, should be thoroughly scanned for any virus or other malware before you attempt to use it
QuickFind your model
Current reset, kit and other information for your printer:




Leave a Reply
You must be logged in to post a comment.