Update
For anyone who hasn’t realised this already, this mod is equally applicable to the P50, T50, T60 and Artisan 50 which are exactly the same printer but with a different coloured case.
Installation Video
I’ve now put together a video on the whole process so this should make the process considerably easier to understand
[jwplayer mediaid=”757″]
Note: Please remember these guides are currently publicly available but they do cost time and money to produce so please help us to provide additional resources by purchasing the appropriate waste kit.
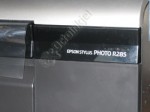
The R285 is incredibly similar to a number of the newer model printers and indicates a change in design for Epson with the waste tank sitting higher in the printer.
The benefit of this new design is, as you will see, that it’s immediately obvious where the waste tube is and easy to redirect.
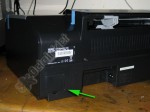
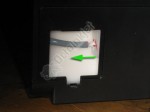
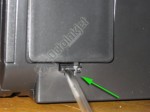
As you can see immediately this printer has the usual trapdoor arrangement with a small release catch at the bottom.
If you look a little closer you’ll realise that there’s actually space in the centre portion, under this catch, for the tubing to exit the printer so there’s no longer any need to notch the trap door.
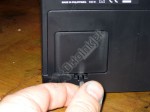
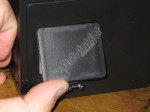
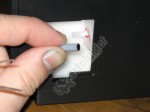
Opening the trapdoor is very simple and just requires a thin flat screwdriver or something similar to gently slot into the catch at the bottom and then lever up and out
As you can see from the photo on the right, the trapdoor hinges at the top so rotate and then pull down to remove it
Now that you can see inside the printer the waste tube is immediately obvious in front of you. The part leading round to the left goes towards the pump system while the end you can see if attached to a nipple on the internal waste ink tank
Originally I assumed Epson had replaced their ink pads with an open tank arrangement but in reality the tank still contains pads
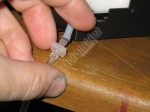
Releasing this tube requires a little gently levering (it seems to be glued in place) while you pull to the left.
IMPORTANT:Do not pull the tube so the length heading to the pump is strained. If you break it off the pump it’s game over!
The picture left just shows the released tube end but if you notice a split or similar, make sure you cut off the damaged section (or repair it if it’s too long a gash) otherwise you could end up with a leak.
Next up, you need to attach your tube extension (OctoInkjet Solo kit shown).
Again be careful and look out for any splitting or damage
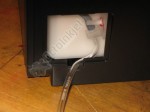
As mentioned earlier in the instructions, the trapdoor has a perfect gap for the tube to exit the printer without requiring notches or other permanent modifications to the printer case
The important thing to remember is that the tubing must not be crimped or impeded in any way. If you ignore this point you could find that the ink will not flow, instead backing up into the parking pad and soiling your printhead!
If this happens you can expect damage to your printhead so take your time and position everthing properly
With the tube in place under the trapdoor latch you should find that the tubing is open and able to allow ink to flow out.
Even though I was able to assure myself that this installation was working fine, you may find your printer is a little different so make sure you check that ink flows freely during a cleaning cycle before you assume it’s finished
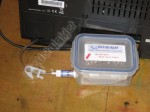
The last thing to do is obviously to attach your chosen tank or container to your tubing and make sure any clamps (such as the one shown) are open and not impeding ink flow.
Run your first test with a single cleaning routine to make sure everything is working properly and adjust as required.
Resetting the Printer
The R280 (R285 / R290) is one of the newer generation printers that Epson have opted to “protect” (for consumers obviously *cough*) with their new activated IPR utility so for those in North America you have some hoop jumping to go through.
The SSC utility does not support this model at all so the only viable option I’ve found to work (at time of writing) is to locate a copy of the Service Engineers Adjustment Utility.
The version for the R290 has been tested and found to work with the R285 and will probably work with the R280 as well but you should be careful to only use the waste counter reset functionality as some
unwelcome results (such as model number changes) have been found with other options.
These are a couple of the publicly available locations for the R290 adjustment utility:
Note: Make sure you scan the files for any virus or other malware before you attempt to use it
Note #2: There is now a working utility to reset the P50 and sister printer models (See Quickfind link below)
QuickFind your model
Current reset, kit and other information for your printer:



Leave a Reply
You must be logged in to post a comment.